
A SPECIAL EDITION FOR THESE TIMES
With a big THANK YOU to all who contributed.
RCBees Newsflashes
As this is a stressful time, your Board is waving the per issue and annual subscription prices for the RCBees Newsletter indefinitely.
A reminder that the FIELD IS STILL CLOSED
The NEXT MEETING is Thursday, April 16th but it will be a virtual meeting on your PC, laptop, tablet, Kindle or iPad, etc. The meeting platform will be specified in an email to all members.
Member News
From Nikolai De Malvensky:
I haven’t been around the field for some time now as I transitioned from working at Matternet to working at Wing doing UAS systems Flight Testing. What is really cool beyond the job itself is that the work location has a 3000ft closed runway! I get all the takeoff and landing space I could ever want for R/C.
I’ve been flying my Hobby King Tundra and Walrus (night version) at home during shelter in as they both are short takeoff and landing planes (the Walrus can use “crowing” or air braking for shorter landings, while the Tundra has “barn door” flaps ability for slow landings. I also fly a tiny multi-rotor inside the home to have fun with the kids (they like to retrieve it for me when it lands near them or hits something 🙂 I wish all the best!
From Joe Parisie:
I am building a garden bench {fooled you huh?} as requested by my wife Cathy. Am also repairing my T-28, reorganizing my garage and throwing dead stuff away . You know, the things that just sit around forever. I may even paint the S_____ . Won’t that be nice? Don’t hold your breath on that one however. Have you tried playing Canasta lately? I think I will buy me a new model, How about a Bene? I don’t really know. All I am trying to do is NOT TO GO STIR CRAZY. That’s all for today folks.
From Eric Thompson:
I sent a few photos of my finished Helium MG a Bill Stevens kit. Who knows when I’ll get to fly it, but it was a pleasant project. 2 meter span, weighs only ~25oz. Looking for another building project to keep me busy, especially considering that we may be stranded here for who knows how long. Cheers!
From Alan Kirby:
NEW BUILDS
I decided to build a Hummer EPP foamie to be my first 3D trainer plane. RCGroups has a discussion group just for the Hummer that is 108 pages long.
I read the entire discussion and took notes for changes and modifications to make. I’ve ordered all the parts and they just started arriving 3/23.
Building to commence upon receipt of the rest of the material. {Photo below}
NEW GADGETS
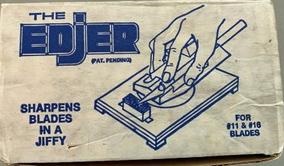
I go through a lots of Exacto blades. Even though I ordered a pack of 100 blades, I really don’t like throwing them away when they get dull. After doing some research, I found an old tool named the Edjer and I ordered one from eBay. Works well!
NEW CONSTRUCTION TIPS
In preparing to build the Hummer and reading the discussion on RCGroups, I found out the tape is difficult to stick to EPP foam. A tip is to use Foam Tac glue on the surfaces and let it dry before you apply tape. Have not tried it yet, But I will when I assemble the Hummer. Happy Flying.
From Richard Tacklind:
Herels a couple projects I’ve been working on while waiting out the “Corona crisis.” The Ultimate Biplane I’m building for Jesse Gifford is coming along nicely, almost ready to cover and finish, as soon as the color scheme is decided on.

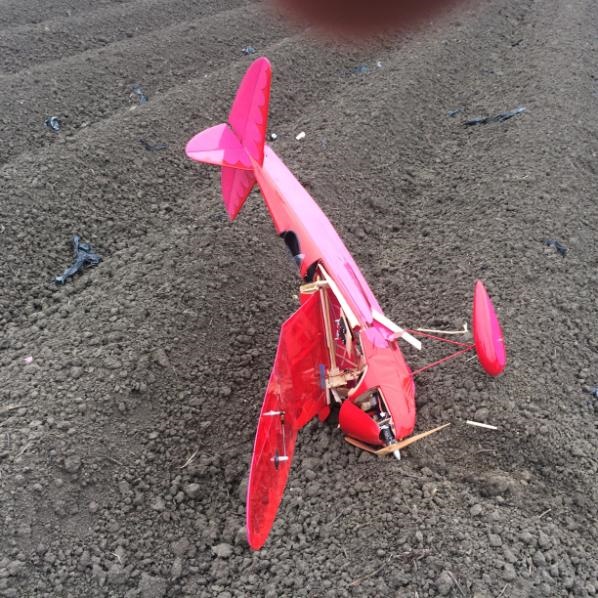
I finished the repair job on the “Pacific Ace Speedster” Old timer model. About ninety seconds into its maiden flight, it suffered a catastrophic spar failure and ended “butt up” in the newly plowed strawberry field. Broke the damn prop! It’s now ready for its “second” maiden flight.
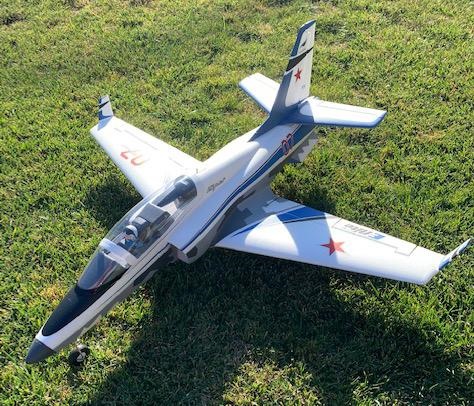
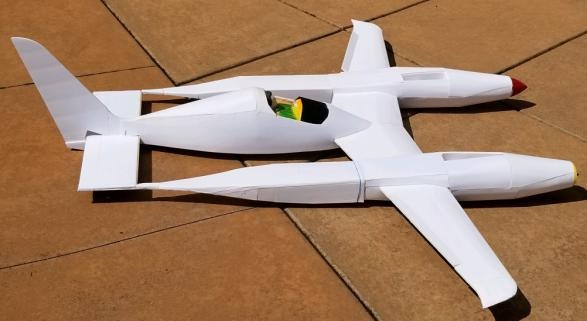
From Alan Brown:
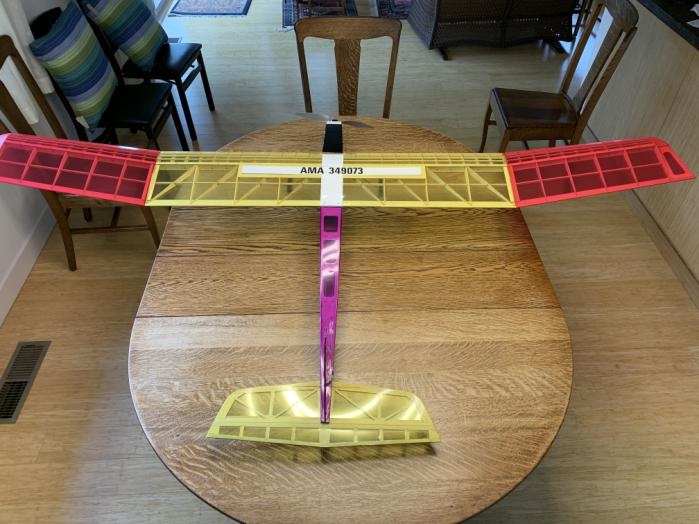
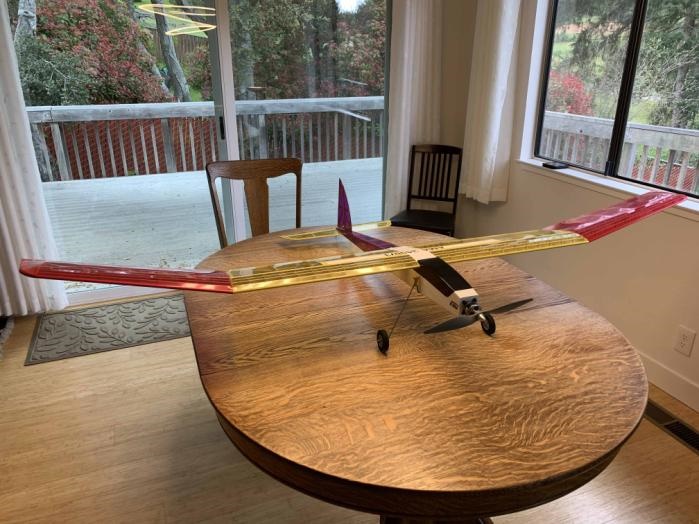
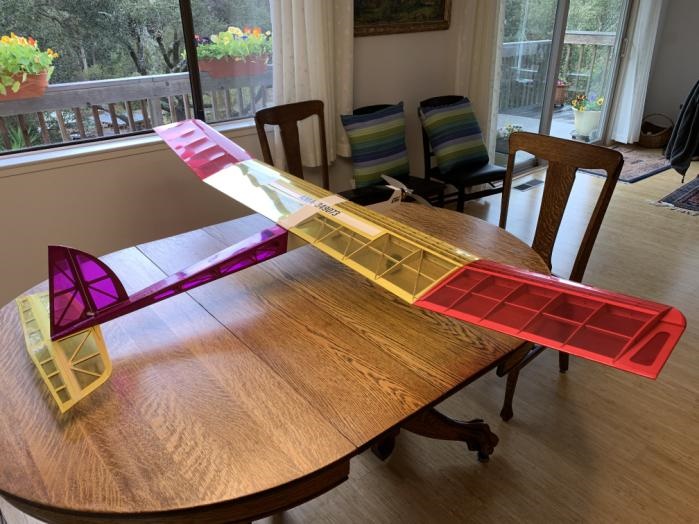
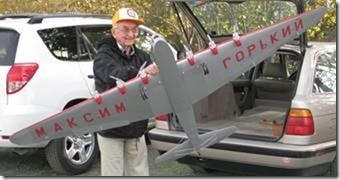
Hi, I’m repairing my old Maxim Gorky – 8-foot wingspan, and 8 motors. The attached photos were taken a long time ago, but are still representative of how it looks now after a fair amount of work. The old antenna is no longer there, but otherwise it’s about right. I’ve even redone the under-wing lettering – Maxim Gorky – in Cyrillic alphabet, as you’ll see below.
Memorial in Moscow to those lost when it crashed:

For more historical perspective, kindly Ctrl-Click: https://ideas.ted.com/the-strange-history-of-a-futuristic-soviet-propaganda-plane/ and please see Alan’s notes at the bottom of the Newsletter.
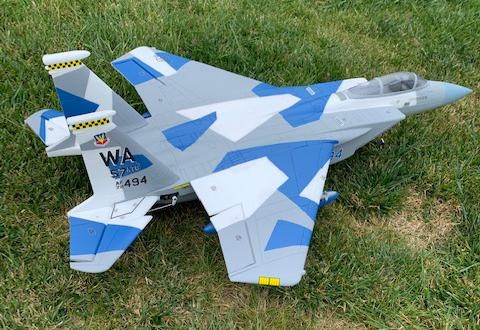
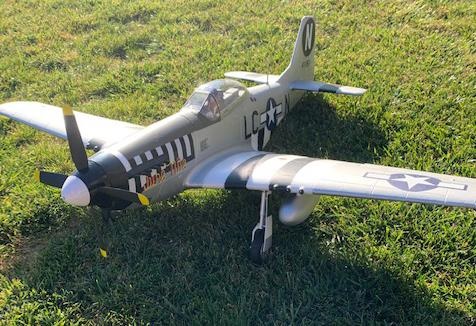
From Jay Petty:
Here are a few of my latest projects that have been keeping me occupied while trapped at home.
{Editor’s note: completed, upgraded, etc.}
From Joe Sluga (in Colorado):
I currently belong to four RC clubs: RC BEES, East Valley Aviators (Apache Junction, AZ), Grand Junction Modeleers (Grand Junction, CO), Sunnyside Aviators (Rifle, CO). EVA is still open. Members there practice social distancing and sanitize everything they touch before and after touching. I haven’t heard anything from the Modeleers, but Sunnyside is still open. We have so few members that social distancing is easy. I was at the field on March 15th with only two other flyers. We’ve initiated a STRICT no kissing policy! 😉
Our club treasurer gave me a Hangar 9 Cap 232g to refurbish for him:
https://www.rcgroups.com/forums/showthread.php?615450-Hangar-9-27-Cap-232G-ARF-Review-by-Jerry-and-Jonathan-Festa
I’s really in good condition with a ZDZ 50NG engine. All I’ll be doing is installing A123 batteries, rebuilding the tank with aluminum fittings and silicone tubing, installing an ignition battery elimination circuit (IBEC), and installing/setting up the owner’s receiver and transmitter. Should keep me out of the bars and pool rooms for a while, anyway (as if there were any such establishments currently open).
I contacted pspmfg.com to order the tank fittings I need, but got a “We are not shipping.” message. I imagine may shippers will be shutting down until the COVID-19 situation improves. I’ll be using Sullivan stuff, instead.
Best wishes to you and all my RCBEES buddies. Please say hello for me to Steve Jones, Alan Brown, Joe Parisi, and the Boraccas. I’ve attached a photo of me with my current contest airplane so you can recognize me in case we ever encounter each other at the Watsonville field. Stay well.

From Michael Hushaw:
1st off I miss our RCBee members, flying and fun. Here’s what I’ve been up to:
- Repairing grounded planes
- Cycling batteries
- Need 40amp ESCs (3)
- Been flying in a open field UMX/Park Flyers
- Flying the flight sim “Real Flight” a little
That’s from me at Seacliff Beach. Take care, wash your hands often and hope to be RCBees flying again soon!
From Dan Morris:
The Pond racer was commissioned by Mr. Pond in an attempt to break the current air speed record at the Reno air races held at that time by Rarebear at 490+mph. Mr. Pond also wanted to reduce the number of WW2 aircraft used in air races to preserve their numbers by providing modern race planes.
He commissioned Bert Rutan to design the plane with a new 1,000hp motor. Bert determined two thousand hp would be required and designed the airframe to reach 527mph with 2 of those motors.
The motor manufacturer failed to build a reliable motor so alternate motors were used. These had constant heating problems and ultimately lead to a crash and death of the pilot.
There was only one model ever built of this design. The engineering details are sketchy at best. I chose a 3 view drawing on line to build mine. It has been used by modelers such as myself.
Warren approached me last year and asked for help to build a Pond Racer. I drew up plans on $tree foam for a 30″ model for him. I also gave him the electronics to build most of it. He had to stop work on it for other activities.
Recently Jacob suggested building a half scale version. At 14′ span that would exceed anything $tree would stand up to. I ran the calcs and concluded a 1/5th scale model would be possible . This is the largest model I have built. 66″ span by 64″ long and 4.5-5 lb.
The quarantine has give me a lot more time to complete so looking forward to the day Jacob finally maidens it.
Pond Racer, 1’2″ tall pilot + two 200HP motors:
Full scale with 5′ 10″ pilot + two 1,000 HP motors

From David Albano:
Hope you are all doing well and staying safe.
The only stuff we have to report is Joshua & I fixed the nose landing gear on his T-28 that got bent a few weeks back during a landing. We just had to remove and straighten the metal rod. It is ready to go for when the field opens again!
We also salvaged the slow-stick that got stuck in the trees at the far end of the runway ~ 2 months ago that took us a few weeks to recover. Although the fuselage was too badly damaged, all the electronics (except the battery) appeared salvageable so we removed them to reuse on the next build.
Take care
The Safety Corner by Hugh Chalmers
Hello flyers! Just a reminder this is a good time to keep safe from the C19 problems; will be back up in the air before we know it and before too long this will just be a past memory. I was just looking at my Mini-apprentice, grabbed the motor and found it a little bit loose. So I took it all apart found one screw missing and two screws loose holding the motor to the motor mount. I bring this up as a reminder to all of us it’s a good time to go over your planes and make sure that they’re in a safe condition. It’s also a good time to fix all of the hinges on your ailerons elevators and rudders and return them to safe operating condition.
And for those of you that are building new planes, remember to bring them to our trainers or myself to look them over and make sure that they’re safe to fly before you put them up in the air.
Down by the River
By Daniel Lipovetsky and Production Crew
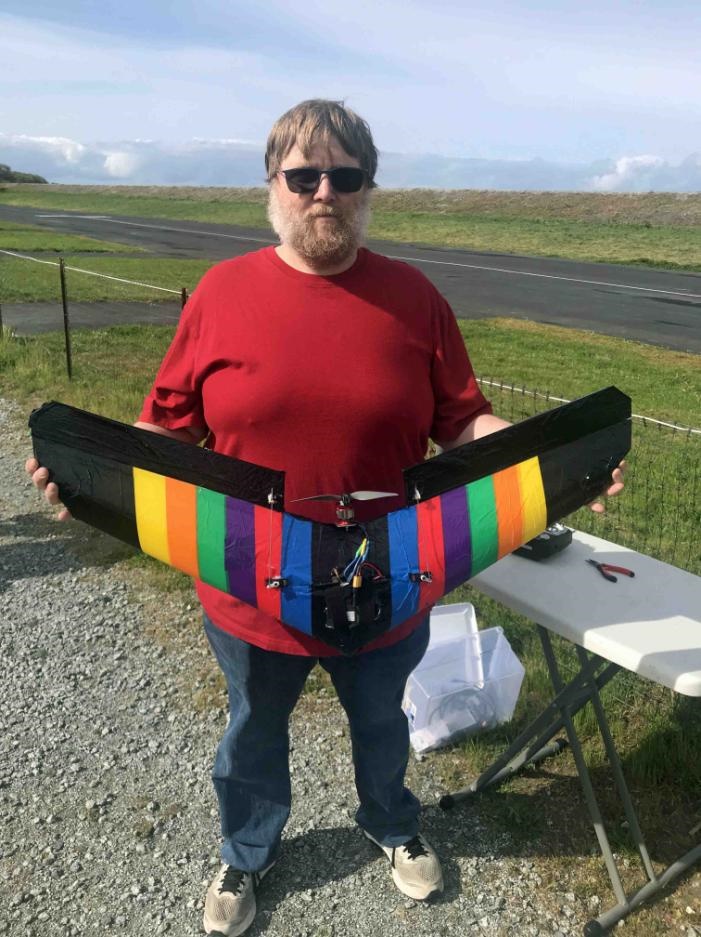
Our newest member Brett McKee flew his rather menacing looking wing before the field closed:
Full Scale Aircraft Image of the Month
June, 1944: B-25’s enroute to their target fly by an erupting Vesuvius.

From a member of our engineering staff:
Using a low cost laser engraver for model building by Bob Frogner
I wanted to expand my capabilities for constructing models out of foam board and balsa. It seemed like a good time to investigate laser engraving machines. There are many possibilities on the market today for such machines. When I started to look around it seemed like the machines were very expensive. A good CO2 laser would cost anywhere from $1000 to $6000 which was way above my price tolerance. Then I discovered some lower cost devices on Banggood and AliExpress. After doing a little more investigation it seemed I could find a machine for around $200 that might be capable of some of the tasks I wanted it to do. What follows is the result of my research and use of one of these low cost lasers.
I purchased a 3000mw 65x50cm from Banggood for about $150. It is basically a two axis frame that uses stepper motors to drive the laser module around the build area. I chose this model because it had a fairly large work area, 65x50cm (20×25 inches). The laser is a blue diode laser with a rated power of 3 watts, although I am not sure if all of the 3 watts is delivered to the work surface. I had read that these blue lasers were not sufficient to cut through foam board but would most likely be good enough to transfer lines onto the surface of the foam board.
The purchase arrived and was very easy to assemble. Good instructions and all parts accounted for.

IMPORTANT NOTE: WHEN WORKING WITH A LASER YOU MUST WEAR PROTECTIVE GLASSES. EVEN WITH A 3 WATT LASER THE BEAM IS SUFFICIENT TO CAUSE PERMANENT EYE DAMAGE.
Next I needed software to control the machine. There are a number of choices available such and Benbox and LaserGRBL that are free. I tested these out and then found another program that seemed much easier to use. It is called T2 laser and costs $39.95. It has many useful functions and is well supported by its developer, a guy called Zax. He was extremely quick and helpful with any questions I had. I highly recommend this software.
Now I needed to feed the software with a design and get lasering. I already had experience with Inkscape, which is a free drawing program available on the web. It is relatively easy to learn and has a lot of flexability. I downloaded a set of plans from Flitetest and got to work using Inkscape. I had to edit the plans to remove unwanted lines, text, etc. It took a little work but was not too bad.
I could break the individual parts into groups and arrange them so that they made the best use of the Dollar Tree foam board.
The beauty of Inkscape is that you can export the files as a DFX file. This is a vector file that will allow the laser to cut the lines by following a path. The laser software can do either vector or raster images. Raster means the path of the laser scans across the page like a inkjet printer. This is fine for some applications but is very slow since the laser would have to scan the entire build area to complete the drawing. With a vector file the laser only traces the desired lines so it is much faster.
Now the fun begins:
I adjusted the engraver to make sure the drive belts were the right tension and the laser was focused on the surface of the work material. Double checked the “home” position of the laser and loaded the drawing file into T2 laser software. After a few trials and errors I was able to get the laser to work the way I wanted. On white Dollar Tree foam board the laser did a great job of producing the pattern on the foam. It did not cut all the way through the foam board but I hadn’t expected it to. What it did was cut through the top layer of paper on the foam board. I was then able to use a hobby knife and follow the “pre-cut” lines very easily to produce the parts. Going forward I would not have to print multiple pages of plans, tape them together, attach them to the foam board and carefully follow the lines to cut out the pieces. It was a very good success.

Next I tried balsa wood. After some experimentation and adjusting of the lasers parameters I was able to cut clear through balsa wood up to 1/8” thick. I had to adjust the speed of the laser and use multiple passes to get the desired results. I felt this would be very useful in making parts out of balsa.
All in all this has been a very successful endeavor. If you are interested in more details please feel free to email me with your questions. (my email is in the club directory)
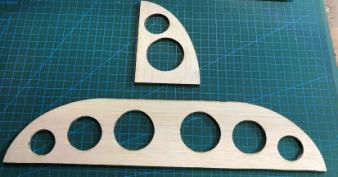
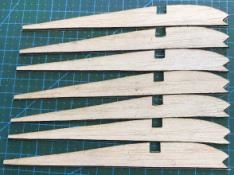
Ribs as printed:
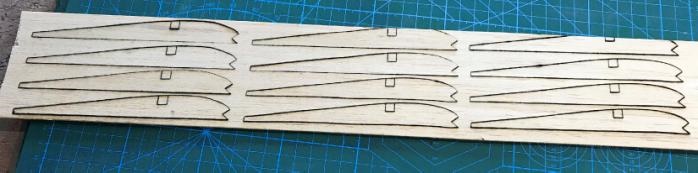
Rudder and elevator parts & cut out ribs
Notes from Alan Brown on the Maxim Gorky
In about 1933 or ‘34, Josef Stalin decided that Russia should make the world’s largest airplane. Tupolev, who had previously made two successful six-engined planes, was instructed to design and manufacture the forthcoming airplane, and was given two years to complete the task.
One of the reasons that I picked this airplane to model was that I could see what I thought Tupolev went through in completing this assignment. Failure, of course, was not an option in Stalin’s Russia, so he designed this fine airplane.
At this size, the engines available in Russia were not powerful enough, and so the state engine manufacturer had to come up with engines to match the airplane. It’s almost a rule in the aircraft industry that if you are designing a brand-new airplane, you use existing well-proven engines, and if you are developing a brand-new engine, you check it out on an existing well-proven airframe. But in this case, these were not options, and so both airframe and engines were new.
Tupolev’s previous large airplanes were very good-looking, with nicely mounted engines on optimally tapered wings. However, if you look closely at the Maxim Gorky (named after the early 1900’s communist poet), you will see one or two anomalies, which I can only ascribe to the engines not developing the power required for the task. Tupolev did, incidentally, complete his assigned task in two years, amazingly enough, although under Stalin the alternatives were not very acceptable! But, and here I’m guessing, the final design had late modifications to meet requirements. If you look closely at the airplane, you’ll see a few things that were clearly changed late in the game.
First, Tupolev, I’m guessing, added two engines on top of the fuselage to give the required total engine thrust. This increased the weight of the airplane to where some of the control surfaces had to be increased in size to accommodate the existing Russian airfields from which the airplane would be flown. If you look closely, you’ll see that the flaps are increased in chord, so that they extend beyond the original wing trailing edge line. Also, the rudder size has obviously been increased by increasing its chord. These two changes seem to me to be the result of the increased aircraft weight versus the airfield limitations.
The history of the airplane is fairly well known. It was flown completely within Russia with a fairly small passenger list (no pressurization in those days), and the passengers sat up front on something like a bridge, much as they might have done as first-class passengers on a ship. To demonstrate the size of the airplane, it was often flown accompanied by a couple of small Russian biplane Polikarpov fighters (less than 30 feet wingspan), flying off each wingtip.
Then one day one of the Soviet fighter pilots decided that it would be neat to do a loop around the outer wing of the Gorki. He obviously had no idea of the strength of the wingtip trailing vortex, and his little airplane got swept back and slammed into the tail of the larger airplane. This caused both airplanes to crash with everyone being killed. Apparently, the pilot’s name went into the lexography of the Soviet Air Force as representing the most stupid thing you could do in the air! And that’s my understanding of how the airplane came to look like it did.
Cheers, Alan